
Decoding Sliver C2 Communications
──────────────────────────────────────────────────────────────────────────────────
Introduction
Public tools can be very appealing to attackers that have few resources or expertise to build their own infrastructure from the ground up. Today we'll be taking a look at one of these tools - one of my personal favorites - Sliver. Sliver is a cross-platform implant framework that allows operators to manage compromised systems over an encoded C2 channel. With this channel, attackers can remotely execute commands on the compromised system to realize their goals. But, there are already plenty of posts out on the web on how to use this tool. So we are going to be taking it a step further and walk through how to go about detecting this bad boy at a network level.
Scenario
I acquired a network capture of a system that was infected with Sliver, for a capture the flag competition earlier this year. (Thanks m4lwhere for writing this challenge!) The capture records all of the packets sent on the network, including the encoded C2 communications between the compromised system and the attacker's server. The goal is to decode the C2 communications and extract the commands that were sent to the compromised system and decipher the 'flag'.
"We've been alerted that something's been stolen from our network, but none of our sensors found anything out of the ordinary. Can you find if a flag was stolen from our network in the packet capture attached?"
The Challenge
Let's take a look at our packet capture. For the purposes of this example, I will be using Wireshark.

Data can be exfiltrated over the network through various protocols, such as HTTP, DNS, ICMP, and even third-party software like DropBox and MEGASync. Our first step is to figure out how the data was exfiltrated. Something cool about Wireshark, is its "statistics" feature, which can help us quickly identify abnormalities, or spikes in network activity. Since the packet capture I have was pre-filtered to DNS, this step was already done for me.
At first glance, this packet capture is limited to three ip address hosts, 192.168.40.73, 192.168.40.1, and 8.8.8.8. Based off of the request and reply patterns, 192.168.40.73 is the client, 192.168.40.1 and 8.8.8.8 are DNS servers. You may also notice that there are two patterns of DNS Name Queries - the first set being lowercase, alphabetical characters with different top-level domains (tlds), and the second being uppercase alphanumeric queries with the tld "data.exfiltrated.com".
Sweet! We have a lead. When operating over DNS, most C2 infrastructures limit themselves to a single domain. So let's try and filter this capture down to just the "data.exfiltrated.com" queries. As we already discussed, 192.168.40.73 is our client, and it looks like those suspicious dns requests are being sent towards 8.8.8.8. So, lets start with that filter:
ip.src_host==192.168.40.73 && ip.dst_host==8.8.8.8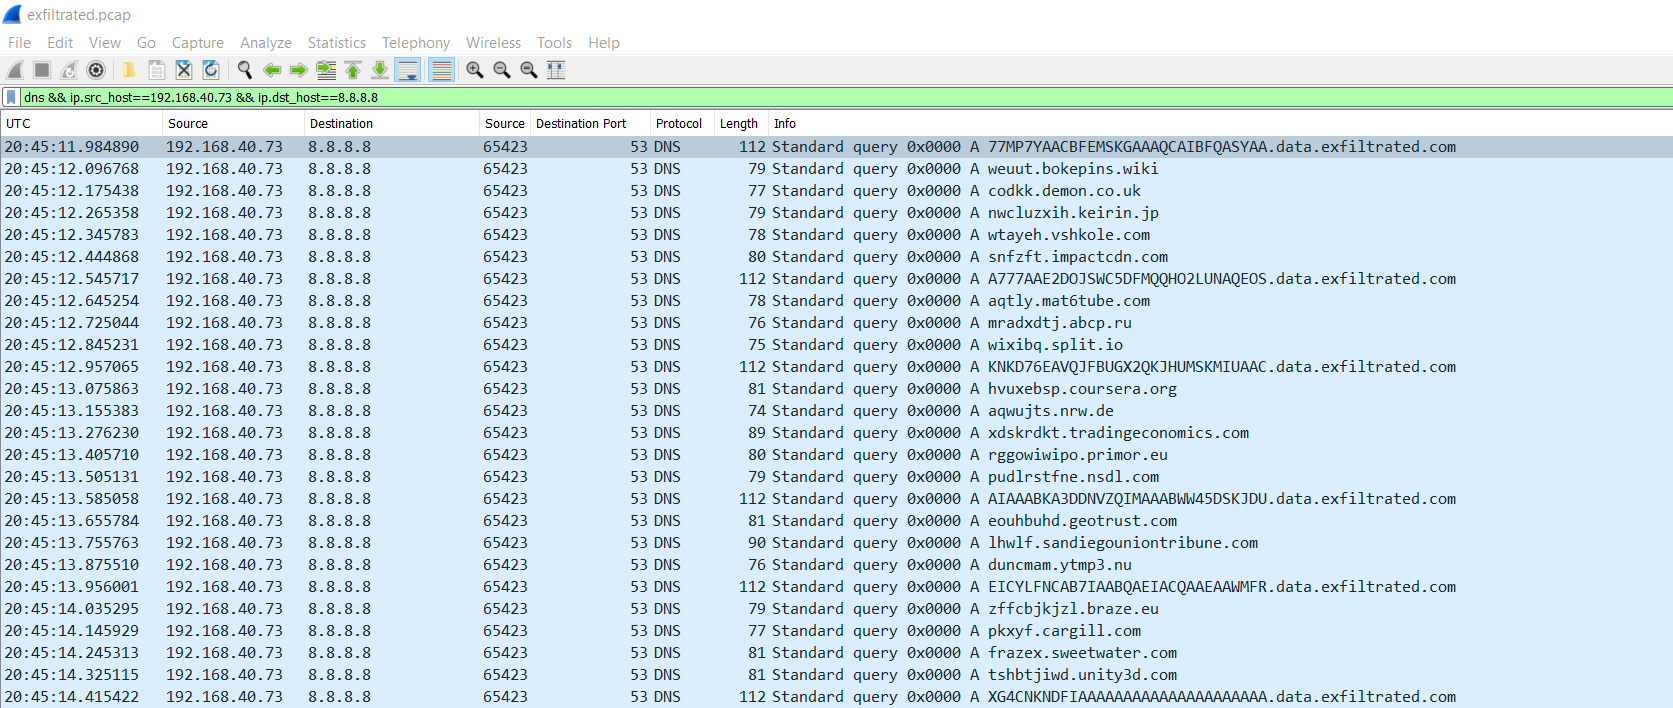
Nice, that looks a little better. Now we can only see the DNS requests sent from 192.168.40.73 towards 8.8.8.8. But it looks like we still have some noise from other tlds in the capture. To limit the DNS name queries to just "data.exfiltrated.com", we can use the following filter:
dns.qry.name contains "data.exfiltrated.com"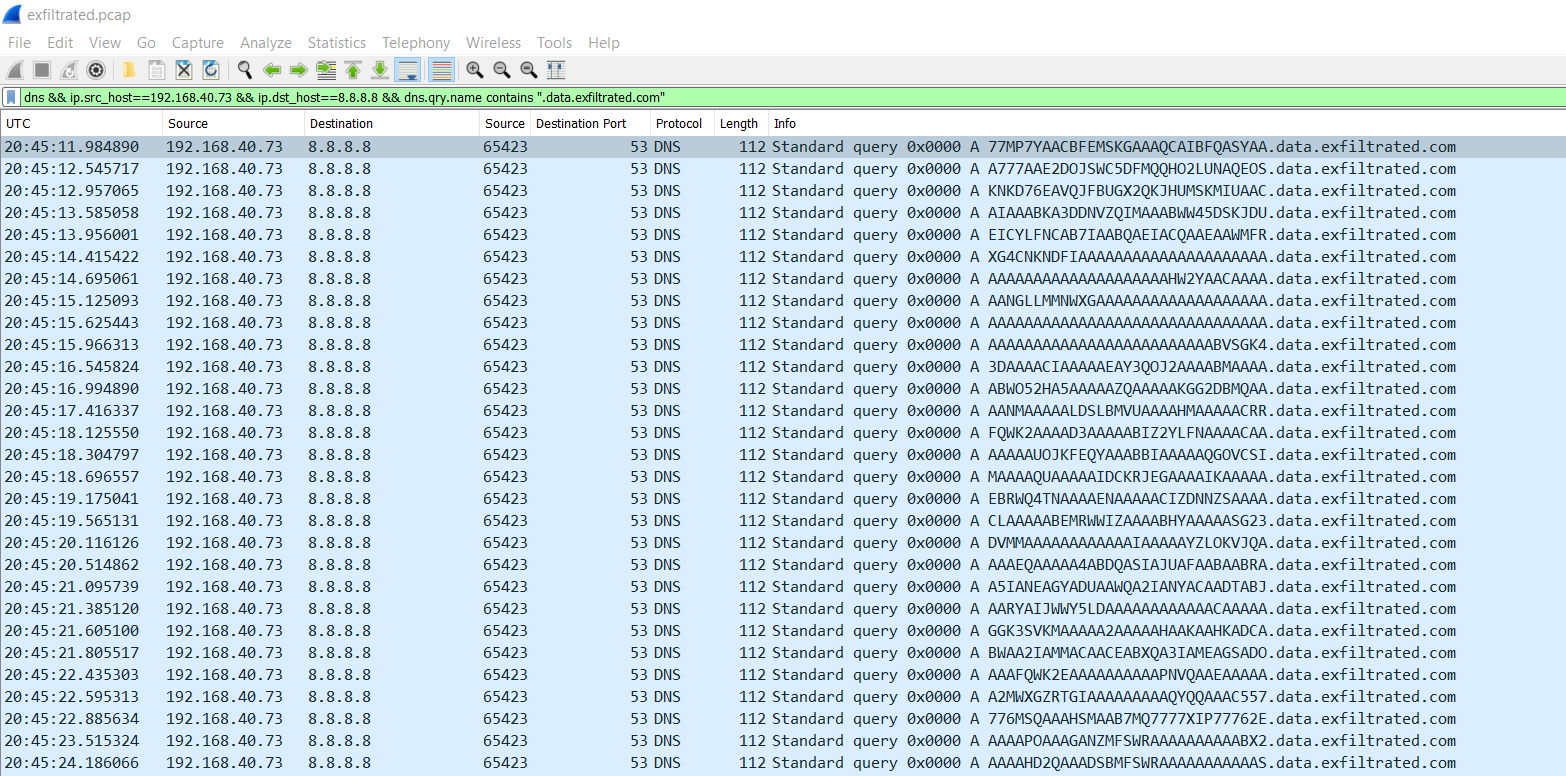
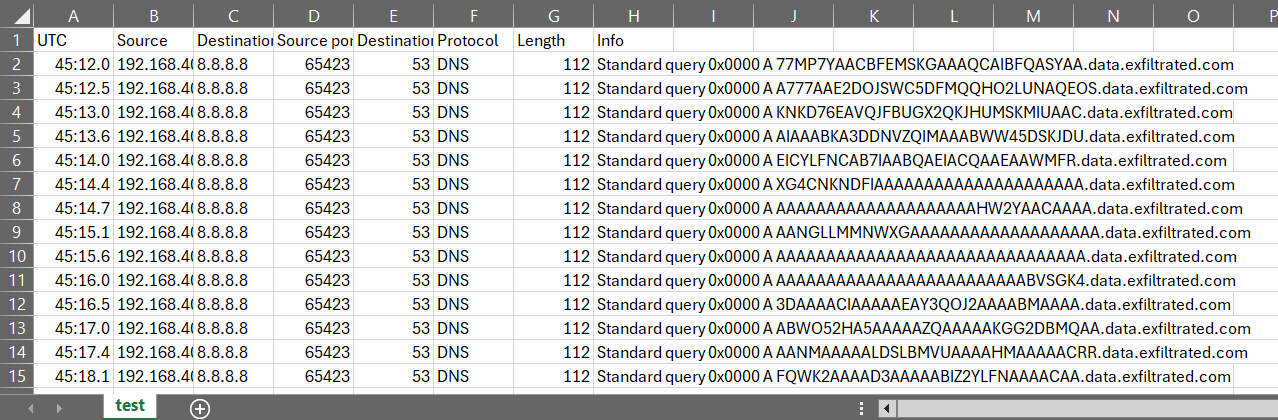
Now we have a much cleaner view of the DNS queries. As this challenge is to decode the C2 communications, we need to obtain the subdomain from each of these queries. The easiest way for me to work with this data is to export the DNS queries to a CSV file. To do so from Wireshark, select all the packets that we filtered with CTRL+A, and then right-click and select "Export Packet Dissections" -> "As CSV". Once we have those as text, we can copy the entire "Info" column into CyberChef.
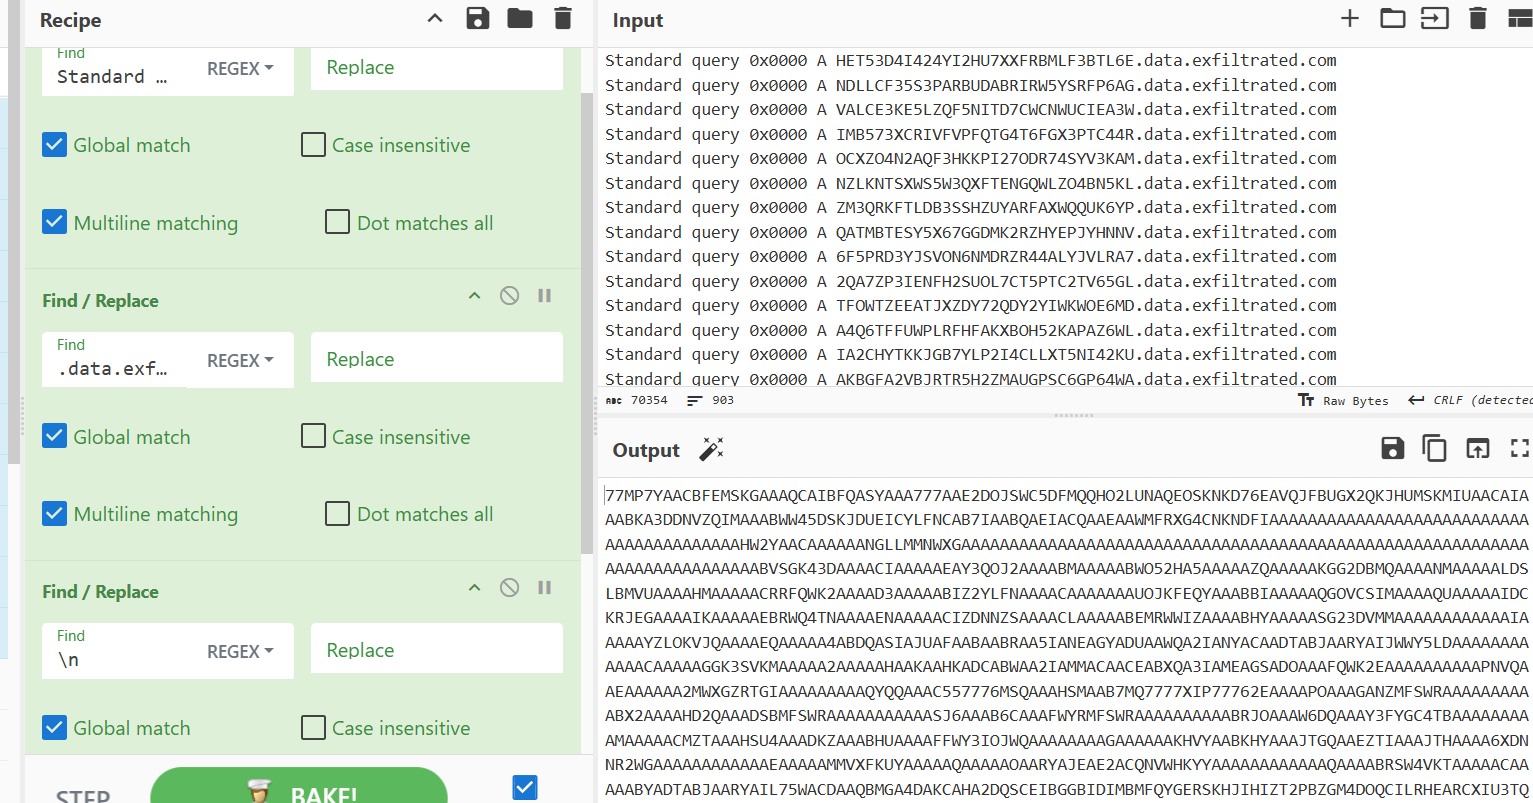
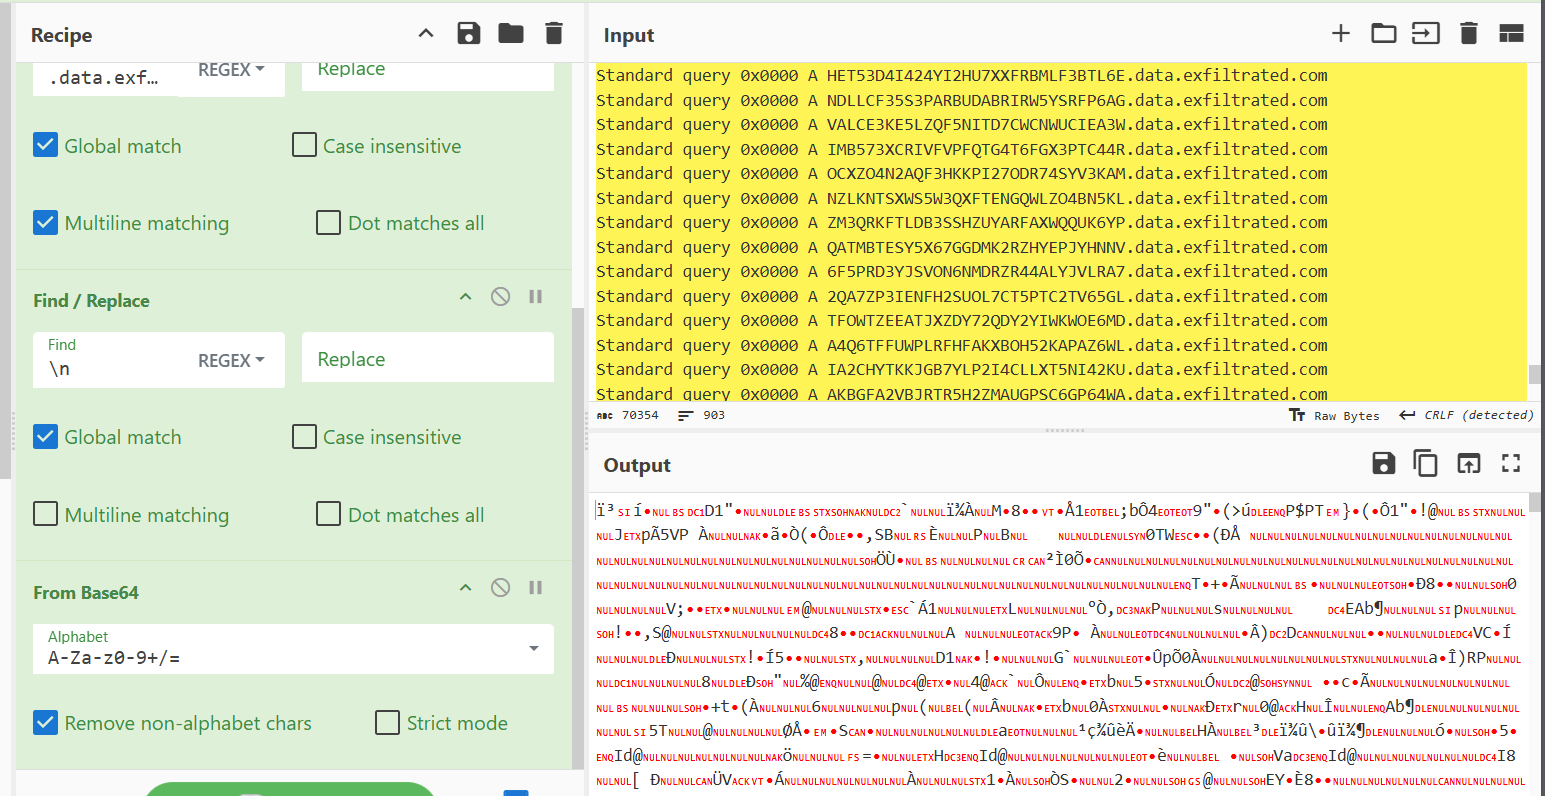
CyberChef is a web application that can be used to decode, encode, and analyze data. It has a wide range of operations that can be used to manipulate data, and is a great tool to have in your arsenal. To get started, paste the text from the CSV file into the input box on the right-hand side of the CyberChef interface. Theres still some extraneous information in our text output, so let's clean that up with CyberChef. In the left-hand pane, we can use the "Find/Replace" option to get rid of everything prior to the subdomains.

Then add another "Find/Replace" operation and do the same for the tld and carriage return. We could have also used the "extract subdomains" operation as well.
Now we have all the subdomains that were queried by the client. The next step is to decode the subdomains to extract the commands that were sent to the compromised system. At first look, this encoding looks like base64, so let's try decoding it with CyberChef. With a drag and drop to the "From Base64 operation", we can see that the output makes absolutely no sense!
This is where the magic of CyberChef can really kick in. If we remove that Base64 option and add the "Magic" operation, we can brute force what this encoding is.
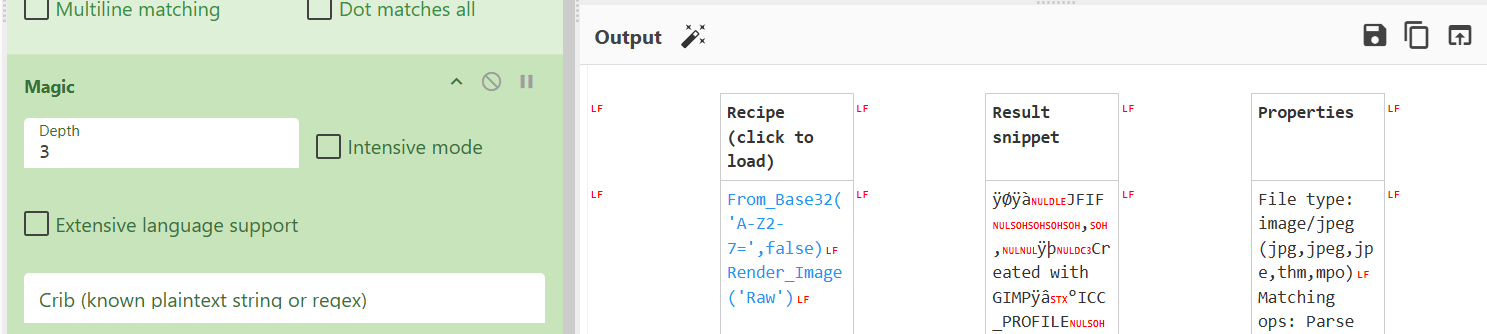
After running the "Magic" operation, we can see that the encoding is actually Base32 encoding, and that the attacker exfiltrated an image as the output has the magic byte for a JFIF file! Super cool. Lets click that paste button and see what the image is.
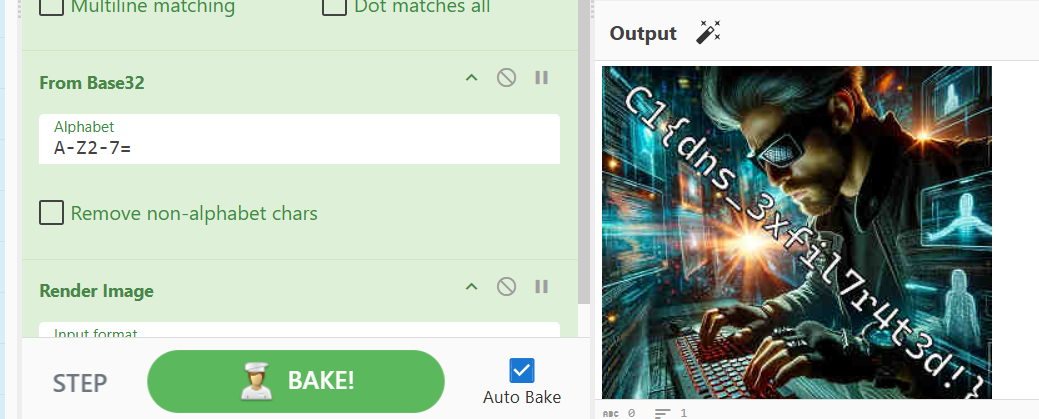
And there we have it! The flag was exfiltrated as an image. Based off the encoding, we can do a basic search and identify that the C2 server was Sliver! Sliver uses base58 by default, but has a backup option of Base32 if the base58 encoding fails. Sliver also uses modified alphabets for encoding, so this would have been a pain to brute force manually.
Conclusion
This was a fun challenge to work through, and a great example of how to detect and decode C2 communications in a network capture. I hope you enjoyed this post, and learned something new.